Install Samsung Galaxy S7 and S7 Edge skins in your Android Emulator
When you develop Android applications, using the Android Emulator to check the behaviour of your application on different kind of devices and configurations is an essential thing. With the tools offered by Google in the Android SDK, you can create virtual devices and define a lot specific parameters to emulate different configurations. For example, you can define screen size, resolution, RAM, internal memory or still sensors supported. There are a lot of possibilities. However, there is even a better feature offered by the Android Emulator. You can define specific skins to change the aspect of your Android Emulator.
Almost two months after the announcement of the Samsung Galaxy S7 and S7 Edge during Mobile World Congress 2016, Samsung has released Android Emulator’s skins for its two new flagships. Discover how to use these skins in your Android Emulator by following these easy steps :
1. We assume that you have already installed the Android SDK and Android Studio on your computer. The following steps cover only Android Studio because it’s the official IDE supported by Google to make Android applications.
2. Now, you must download the Samsung Android Emulator skins for Samsung Galaxy S7 or S7 Edge. For each skin, you can choose white or black color.
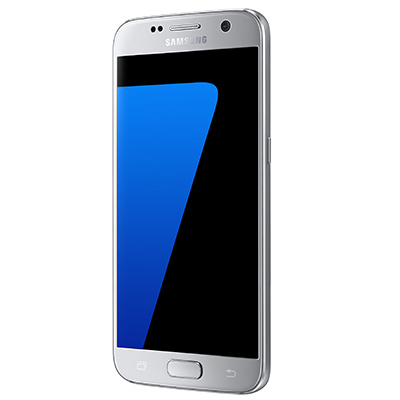
For Samsung Galaxy S7 Emulator Skin, go here :
http://developer.samsung.com/technical-doc/view.do?v=T000000287
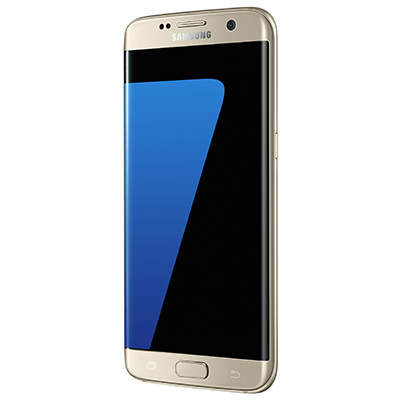
For Samsung Galaxy S7 Edge Emulator Skin, go here :
http://developer.samsung.com/technical-doc/view.do?v=T000000288#none
3. When downloads are done, extract the zip files in the path of your Android Studio installation that is like that : Android Studio > plugins > android > lib > device-art-resources
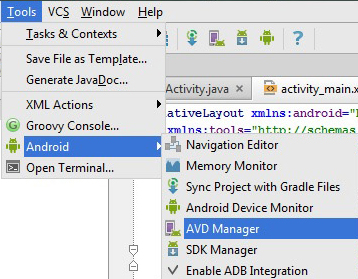
4. Now, you can launch Android Studio and go to Tools > Android > AVD manager entry
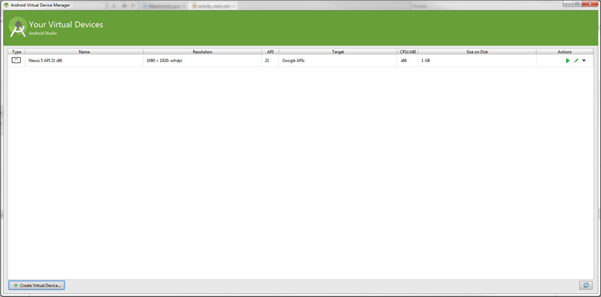
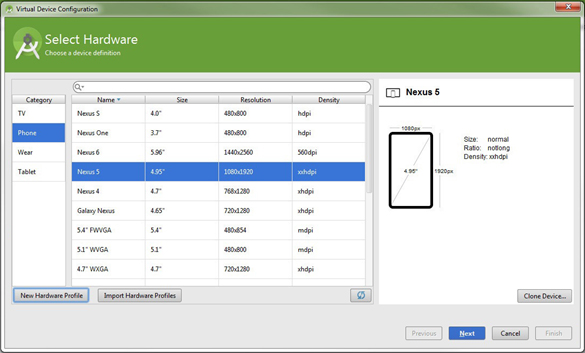
5. In the AVD Manager windows, click on “Create Virtual Device”
6. Click “New Hardware Profile” on the Virtual Device Configuration section
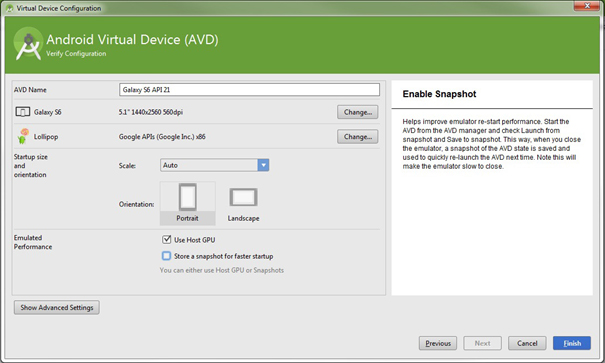
7. Now, it’s the interesting part. You have to complete the fields with the specifications you would like to use.
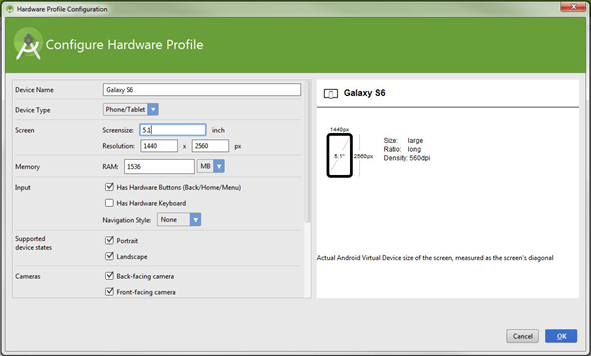
For Samsung Galaxy S7, specifications to enter are the following :
- Screen Size : 5.1 inches
- Resolution : 1440 x 2560
- RAM : 4 GB
- Internal memory : 32/64 GB
- Card slot : microSD, up to 200 GB (dedicated slot)
- Hardware buttons : Yes
- Supported device states : Portrait and Landscape
- Cameras : Front and Back
- Sensors : Fingerprint, Accelerometer, Gyro, Proximity, Compass, Barometer, Heart Rate, SpO2
For Samsung Galaxy S7 Edge, specifications to enter are the following :
- Screen Size : 5.5 inches
- Resolution : 1440 x 2560
- RAM : 4 GB
- Internal memory : 32/64 GB
- Card slot : microSD, up to 200 GB (dedicated slot)
- Hardware buttons : Yes
- Supported device states : Portrait and Landscape
- Cameras : Front and Back
- Sensors : Fingerprint, Accelerometer, Gyro, Proximity, Compass, Barometer, Heart Rate, SpO2
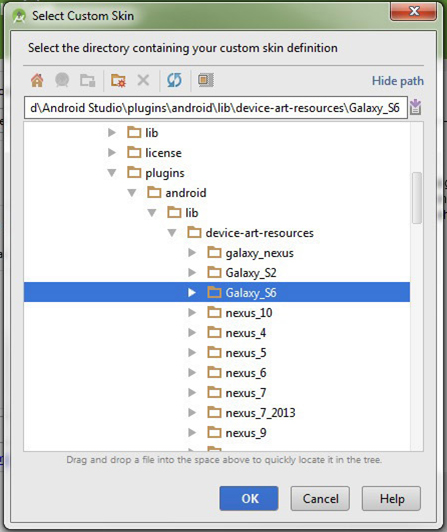
8. In the Default skin section, pick the folder of zip file you have extracted previously in the device-art-resources folder.
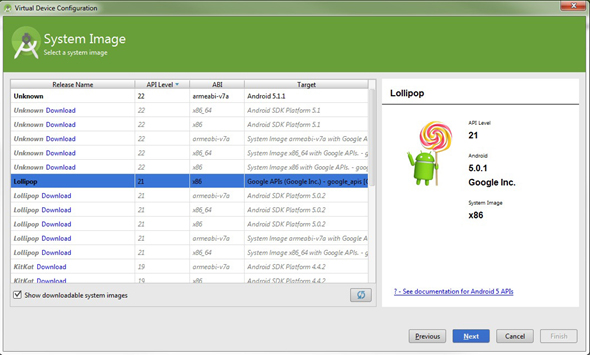
9. Now, you can select the system image you would like to use for new virtual device. You can choose Marshmallow or Lollipop.
10. Once the configurations are ended, you can check all is correct and click on the finish button
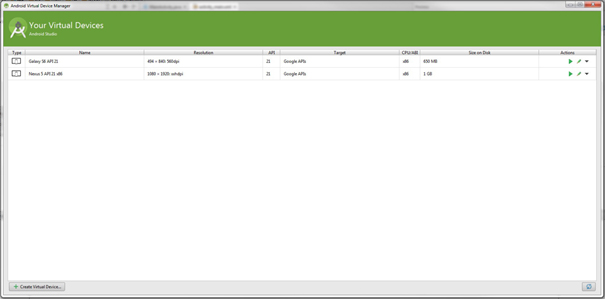
11. On the AVD Manager, you can see your new virtual device listed. To launch it, you have just to select if and click on the play icon
12. After some seconds, may be minutes if your computer is slow, the Android Emulator skinned must appear on your screen.
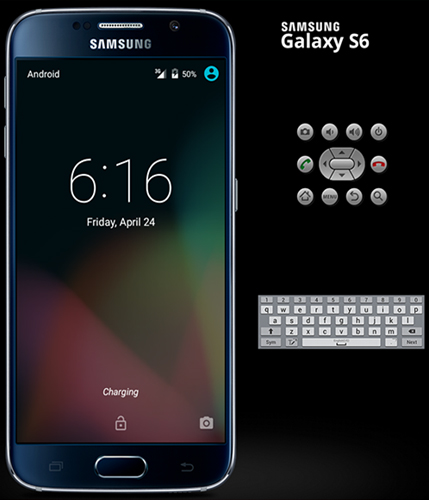
Note here that we have used a Samsung Galaxy S6 skin for the example but steps are the same for Samsung Galaxy S7 skin or some others skins you can find.
Like always, don’t forget that Android Emulator have some limitations compared to physical device. For example, it’s impossible to place or receive real phone calls, simulate USB connections, capture Camera / Video inputs, use device-attached headphones or still use Bluetooth. But, it stays a great tool that Android developers can’t ignore to test their applications.


Leave a Reply
You must be logged in to post a comment.