Building A Bitcoin-Like Blockchain In JavaScript
Coding your own Blockchain will help you to understand the internals of Bitcoin.
The Blockchain is a real technological revolution that promises to profoundly change many industries in the future. In cryptocurrencies, Bitcoin is the first successful implementation of the Blockchain. This implementation is even a phenomenal success that has made Bitcoin the most successful asset of the decade.
The Bitcoin was created by Satoshi Nakamoto and made public on January 3, 2009. The internal functioning of the Bitcoin is detailed in its white paper “Bitcoin: A Peer-to-Peer Electronic Cash System” which is a real gold mine for any developer wishing to implement a Blockchain equivalent to that of the Bitcoin.
On reading this white paper, you will notice the existence of three main parts in the Bitcoin Blockchain:
- Its internal core with the validation of transaction blocks via the mining process.
- Local management of transactions on the Blockchain.
- Peer-to-Peer networking of the Blockchain.
In this article, I propose to learn how to build the internal core of a Blockchain whose functioning will be equivalent to the Bitcoin. I will use the JavaScript programming language but the concepts presented can easily be applied in other languages.
Modeling A Block Of Transactions
The Bitcoin Blockchain is composed of blocks linked one after the other by their signature SHA-256. Each block contains transactions made by its users. Since we have chosen not to implement, for the moment, the transaction management part, the blocks of our Blockchain will be string data.
A block will contain the following information:
- An index
- The timestamp to store the date of creation of the block
- The hash of the previous block
- The data stored in the block
- The hash of the current block to ensure the integrity of the data it contains
This gives us the following code:
Calculation Of The SHA-256 Signature Of A Block
The hash of the blocks of our Blockchain will be calculated by relying on the cryptographic hashing algorithm SHA-256 which you will find all the details on Wikipedia: https://en.wikipedia.org/wiki/SHA-2.
I will rely on the JS-256 code library which provides a hash function for SHA-256.
You will therefore need to add the dependency to this code library within the program:
<script src=”https://cdnjs.cloudflare.com/ajax/libs/js-sha256/0.9.0/sha256.min.js"
 integrity=”sha256-cVdRFpfbdE04SloqhkavI/PJBWCr+TuyQP3WkLKaiYo=”
 crossorigin=”anonymous”></script>
I can now create a calculateHash function that takes a block as input and returns its SHA-256 signature as a string using the sha256 function from the JS-256 code library:
Mining A Block
We are almost done with the development work for our block. We still have to implement the mining process that is at the heart of the Proof-of-Work consensus algorithm used by the Bitcoin Blockchain.
Mining consists of trying different SHA-256 signature values for the block so that this signature starts with a defined number of zeros.
This number of zeros here represents the difficulty of mining the blocks of our Blockchain. As with the Bitcoin Blockchain, this difficulty may change over time. We must therefore pass this difficulty as a parameter of the mineBlock function that we will create.
Within this function internal to the Block class, I will set the variable nonce to 0, which represents the number of attempts made before the block could be mined within the given constraints.
Then, I will retrieve the initial hash calculated at the creation of the block and loop until this hash starts the number of zeros equal to the difficulty input parameter. At each iteration, a new SHA-256 signature will be calculated until the hash starting with the desired number of zeros is found.
This gives us the following function within the Block class:
Modeling The Blockchain
A Blockchain is a distributed database responsible for ensuring the integrity of its data. To represent it, I will define a Blockchain class with a difficulty property that will be the image at a moment T of the difficulty of mining blocks on this Blockchain.
I will also define an array that will be used to store the different blocks stored within the Blockchain.
All this gives us the following code for the Blockchain class:
Creating And Mining New Blocks
The Blockchain you are learning to develop will allow the creation of new blocks and their mining taking into account the current difficulty of the Blockchain.
To do this, I add a newBlock function taking data in string format as input and outputting a new block for the Blockchain. This newly created block is linked to the hash of the last block of the Blockchain via its previousHash property.
Then, I define an addBlock function in charge of adding a block to the Blockchain. Before adding the block, the mining operation will be performed by calling the mineBlock method of the block being added.
Finally, it is necessary to update the constructor code of the Blockchain class in order to create the genesis block. This block will have an index at 0 and an empty previousHash property.
This gives the following code for the Blockchain class at this point:
Checking The Validity Of The Blockchain
The Bitcoin Blockchain guarantees the integrity of the data of the blocks it stores in order to ensure its validity to its users. In order to check the integrity of our Blockchain, I will define three methods in the Blockchain class to check that:
- The first block is valid
- A new block is valid with respect to the previous block
- The Blockchain is valid
In order to implement these methods, it is necessary to define the validity criteria that we must consider. Thus, the first block is valid if its index is equal to 0, it does not have a previous previousHash and finally if its hash is correct.
A new block is valid next to the previous block of the Blockchain if its index is incremented by 1 compared to the index of the previous block, its previousHash field is filled with the hash of the previous block and finally if its hash is itself coherent.
Finally, a Blockchain is valid and the integrity of its data is guaranteed when the first block is valid and each block that composes it is valid next to the block that precedes it.
All this gives us the following complete code for the Blockchain class:
Our Bitcoin-Like Blockchain In Action
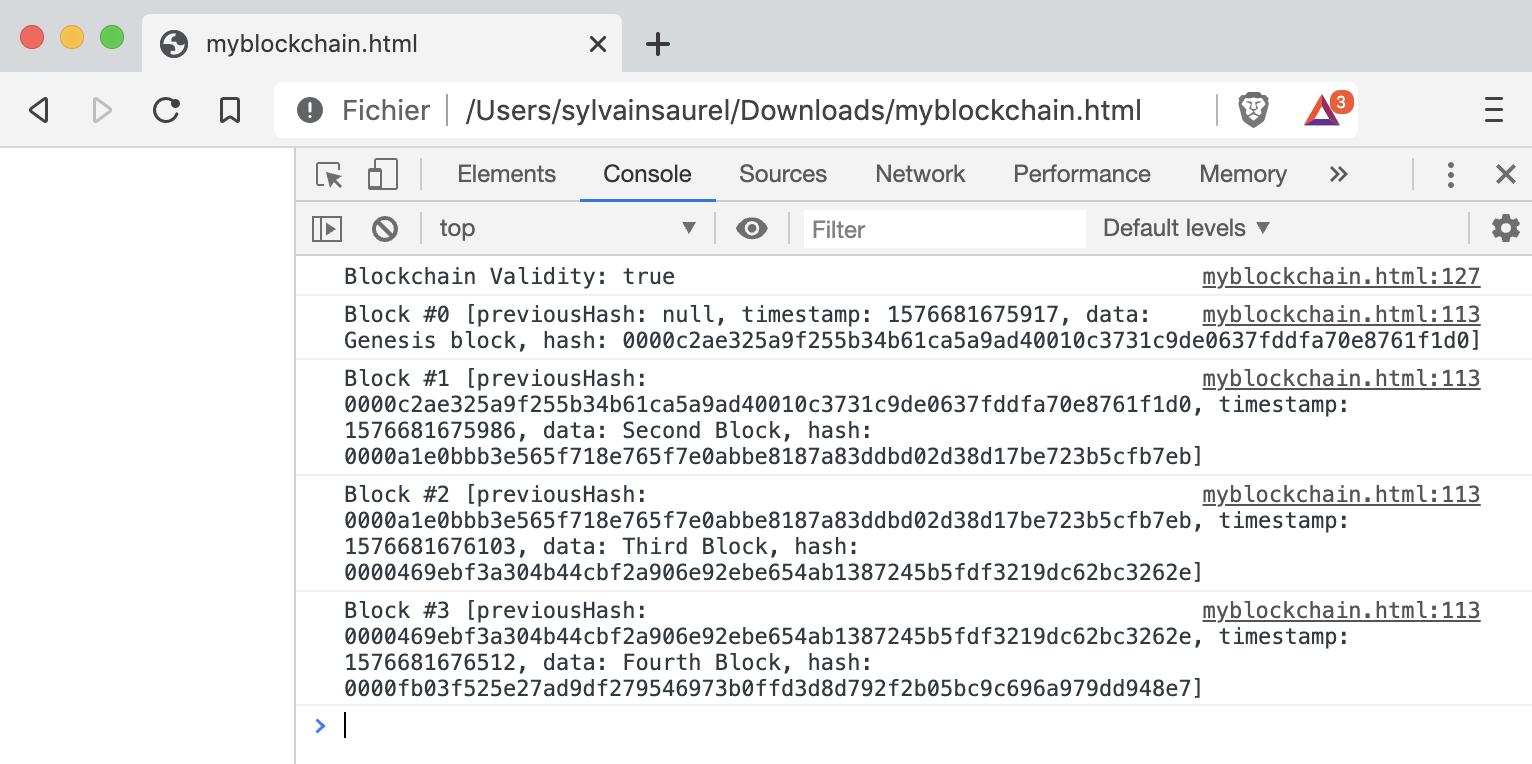
The Block and Blockchain classes having been developed, we can now put our Bitcoin type Blockchain into action. To do this, I suggest you create an instance of Blockchain with difficulty 4 and then add some blocks.
Following the addition of these blocks, I will call the isBlockchainValid method to check the validity of our Blockchain.
Finally, the call to the display method of the Blockchain class will allow us to visualize the blocks contained within it as well as their links.
All this gives us the following code:
Executing this code in a browser such as Brave Browser produces the following result:
Corruption Of Our Blockchain
In order to further verify our method for checking the validity of the Blockchain, we will corrupt our Blockchain by integrating a corrupted block. Once this addition has been made, it remains to call the isBlockchainValid method of the Blockchain class:
Executing this code in a browser such as Brave Browser produces the following result:
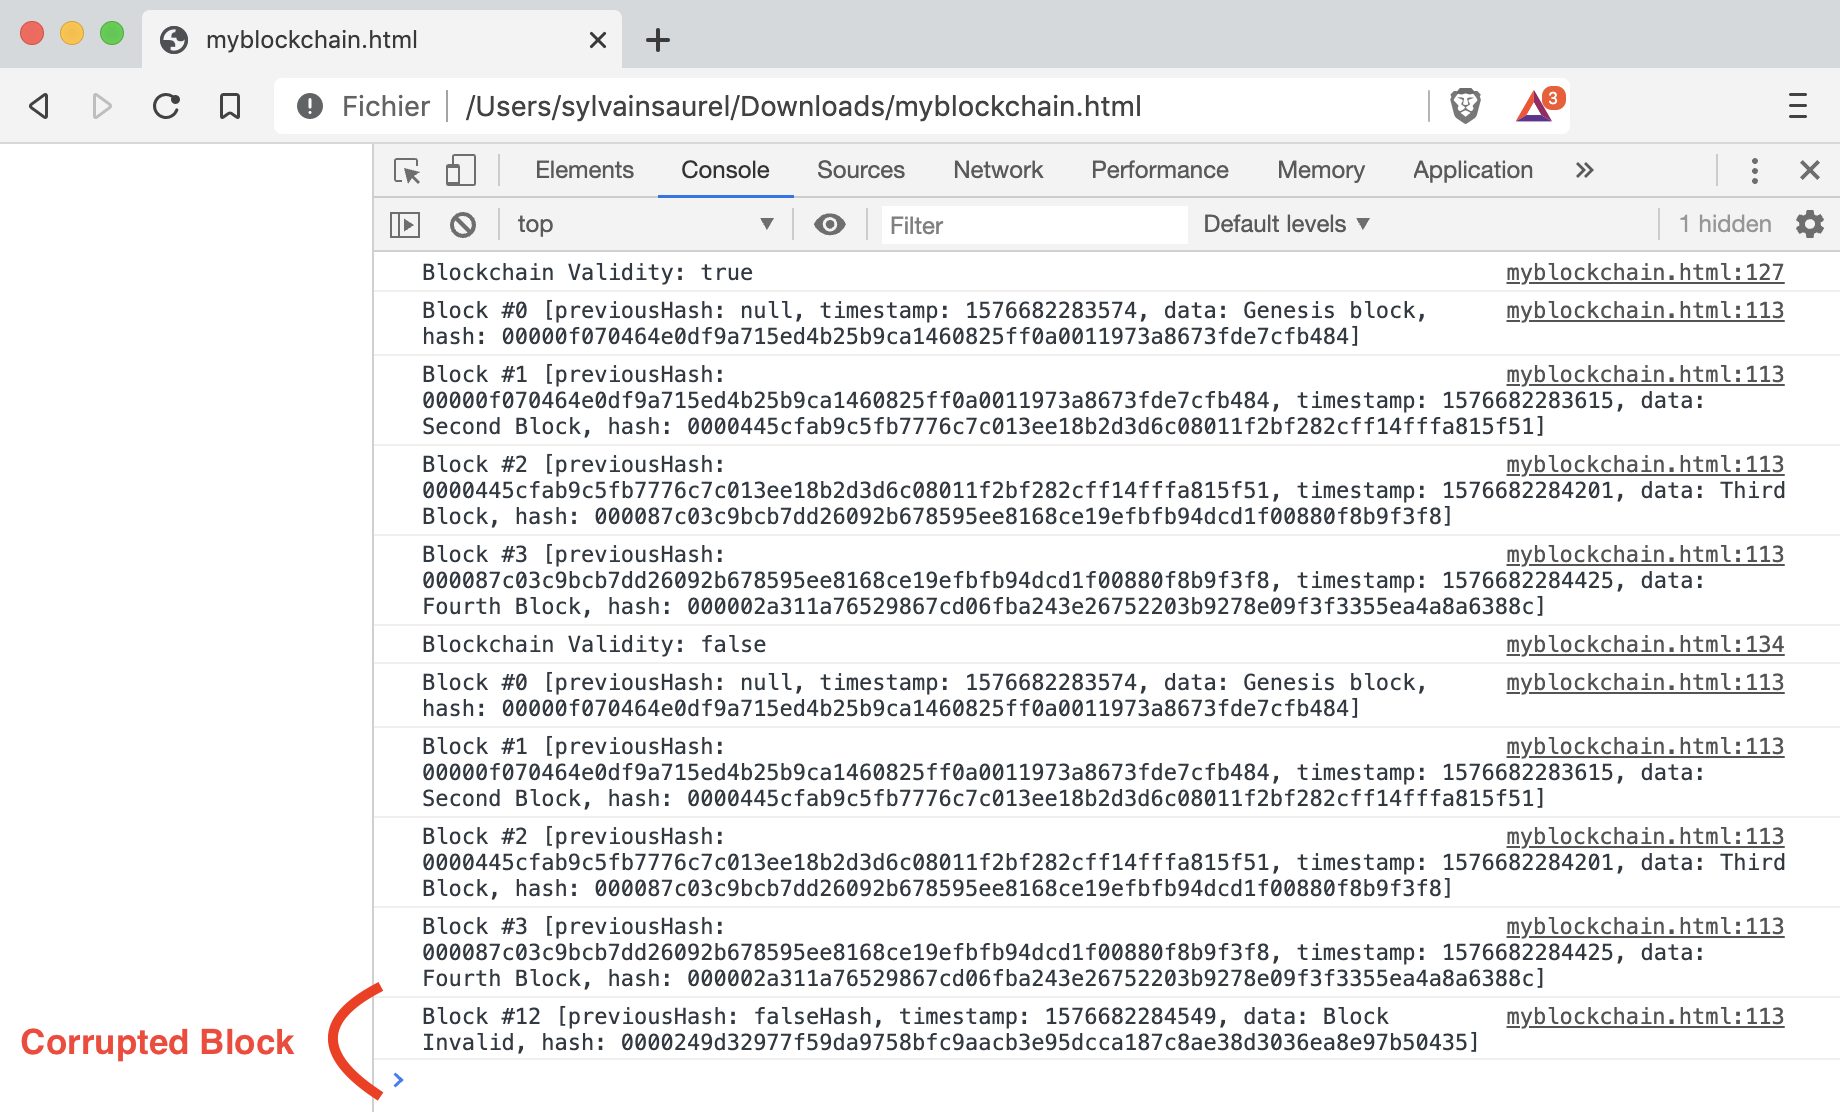
Our Blockchain is therefore well able to detect if it is corrupted or not.
To Go Further
This article will have shown you how to create the core of a Bitcoin Blockchain in Javascript. To go further, you can add a graphic part to the program to allow users to add blocks at will. You could also add a block explorer.
In addition to these few graphic improvements, most of the work that remains to be done is to implement transaction management for our Blockchain in the first instance. In a second step, Peer-to-Peer networking of the Blockchain will be the next logical step. This last step allows to have a complete Bitcoin Blockchain in JavaScript.
If you are interested in the subject and would like me to explore the subject further in the future via stories presenting the implementation of these parts, I suggest that you use the comments to inform me.


Leave a Reply
You must be logged in to post a comment.