Develop a WiFi Scanner for Android
The Android SDK comes with a lot of exciting features for developers. The WiFi API provided with the SDK is really interesting. In that tutorial, you are going to develop a WiFi Scanner Application with Android Studio. You will learn how to scan the WiFi networks around your Android smartphone or tablet.

Note that you can discover this tutorial in video on YouTube :
You will note that we don’t manage permissions in the tutorial because we are focused on the WiFi API. But, for an Android Application aiming to be published on the Google Play Store, you will need to target Android SDK 27 and to manage Android Permissions.
To help you in this task, you can watch the following video on the SSaurel’s Channel :
Adding the Permission
The first step is to add the correct permissions in the Android Manifest of our Android Application. We will need to add the ACCESS_WIFI_STATE permission. It will allow our application to access information about WiFi networks.
Creating the User Interface
The next step is to create the User Interface of our WiFi Scanner Application. It will be simple with a ListView and a Button. In the list, we will display the WiFi networks detected by our smartphone or tablet. The button will let the user to start the WiFi Scanning process.
Writing the Java Code
Now, it’s time to write the Java code of the Main Activity. On the Android SDK, the WiFi API is accessed via a System Service called WifiManager. Once we got the WifiManager service instance, we need to check if the WiFi is enabled on the device. If no, we enable it by calling the setWifiEnabled method with true in parameter :
Then, we can start to scan the WiFi networks around us. For that, we need to use a dedicated BroadcastReceiver registered with the following intent :
WifiManager.SCAN_RESULTS_AVAILABLE_ACTION
Once the BroadcastReceiver is registered, we can start to scan the WiFi networks by calling the startScan method of the WifiManager service :
When the scanning is ended, the onReceive method of our BroadcastReceiverimplementation if called. We need to call the getScanResults method of the WifiManager service to get the results. And we don’t forget to unregister our BroadcastReceiver to save the Battery of the device.
Last step is to iterate on the list of results returned by the getScanResults method :
This give us the following code for our Main Activity :
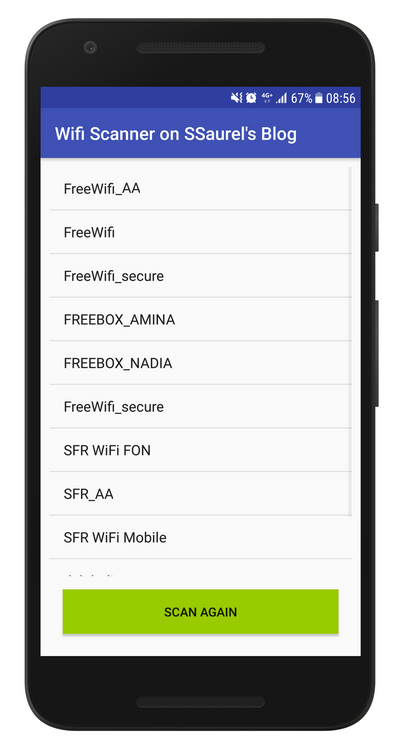
WiFi Scanning App in Action
Now, we can test our WiFi Scanning Android Application. By launching it on your Android device, you should get the following result :
That’s all for that tutorial. If you have some questions, don’t hesitate to use the comments below.
To discover more tutorials on Android development, you can visit the SSaurel’s Channel on YouTube :


Leave a Reply
You must be logged in to post a comment.