Use Visual Studio Emulator for Android with your Android Studio IDE
At the end of 2014 year, Microsoft has announced a fast and free Hyper-V compatible Android emulator usable to make Android developments in Visual Studio IDE. However, Android Studio and still Eclipse ADT are the primary options used by developers to make Android applications.
Since Visual Studio Emulator for Android is very appreciated by developers thanks to its great performances and to answer to Android developers asks to get the emulator available for their current IDE, Microsoft has decided to make it available for all during summer 2015.
Download and Install the Emulator
To start, you must download the emulator by clicking on the following direct link :
http://aka.ms/blogdownloadvsemu
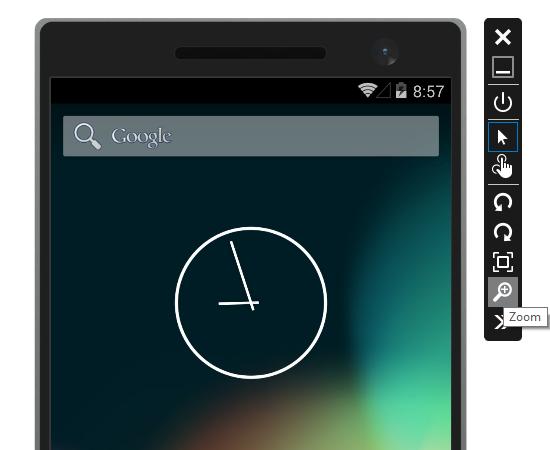
Once you’ve installed the emulator, you need to activate a free license on your first launch by signing to with your Microsoft Account. To start the emulator, go on the emulator manager windows, and then click on the green “play” button.
Work in Android Studio with the Emulator
By default, Emulator connects to ADB (Android Debug Bridge) as if it were a USB-connected device, but to get a smoother experience during your developments using Android Studio you can follow the following steps. Main goal here is to configure Android Studio to avoid use the slow standard Android SDK emulator and target the Visual Studio Emulator for Android.
1/ In Android Studio, go to Run menu and click Edit Configurations…
2/ Under Defaults / Android Application, set Target Device to Show chooser dialog
3/ Check Use same device for future launches
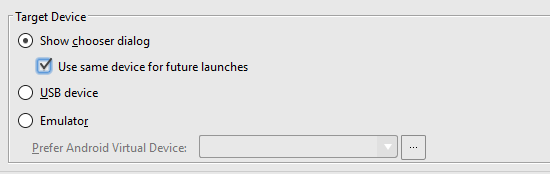
This will prompt you to select and ADB-connected device when you debug your application the first time, and then remember that device for next debugging sessions.
Other approach can be to create a toolbar item for quick-launching the emulator manager in Android Studio or starting particular device profile. To achieve that, follow these steps :
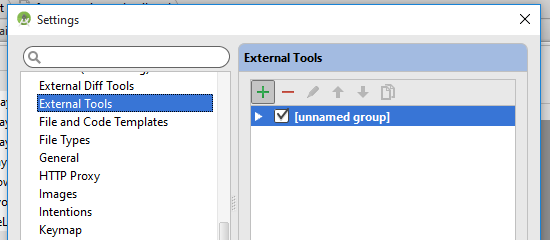
1/ Go to File > Settings > External Tools
2/ Click Add
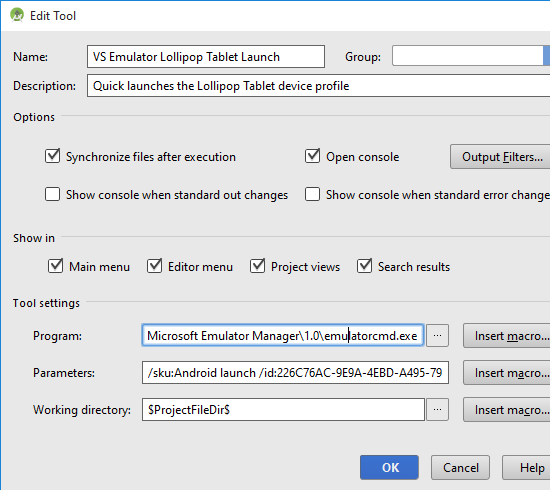
3/ In the Create Tool dialog, enter a name and description for the task, then fill in the Program & Parameters with the following values (depending on the task) :

To get the id of a profile by running emulatorcmd.exe /sku:Android list /type:device
4/ Click OK to finish editing the external tool, and OK again once you’ve added all of your tasks to close the Settings dialog.
5/ Right-click on the Android Studio toolbar and click Customize Menus and Toolbars…

6/ Under Main Toolbar, identify where you want the new toolbar icon to appear, and click Add After…
7/ Pick the external tool you created under External Tools and click OK
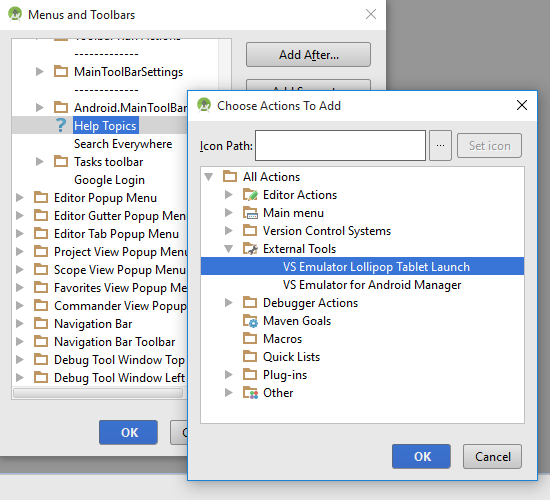
8/ Click OK again to close the Menus and Toolbars dialog
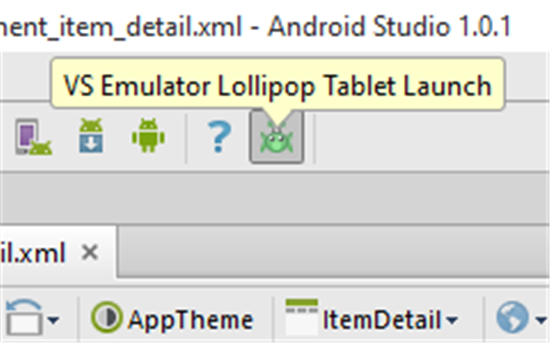
That’s all ! Now, you can use a fast Android Emulator for your developments. Thanks Microsoft !


Leave a Reply
You must be logged in to post a comment.