Learn to create a Rotary Dialer application for Android
Classically, Android users use stock dial to make calls. There are also many alternatives available on Google Play Store for stock dial. But, some users like add a touch of retro to their smartphone and seek for an old school rotary dialer.
If old guys are nostalgic about old rotary dialers, young guys sometimes doesn’t know what it is. So what is a rotary dialer ?

A rotary dialer was used on old phones to dial digits and call numbers.
Create an Android dialer with that retro touch is an interesting subject and more a good way to learn how to create a specific view on Android.
1. Images
First, we need to create some images to represent a rotary dialer. We need the following images :
- A background image of the rotary dialer with numbers and letters. This image must be static during rotary dialer animation.
- A top image with the tick. This image must be also static during animation.

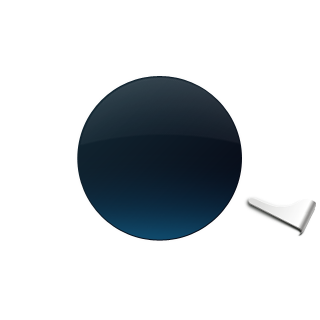
- Last image will be used to be rotated during the rotary dialer animation.
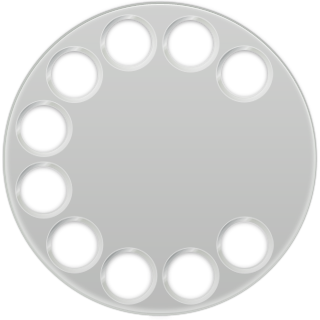
These images must be in the drawable directory of resources in your project.
2. Draw the Rotary Dialer
To draw the rotary dialer, we need to create a specific view named RotaryDialerView that must extend the class View :
public class RotaryDialerView extends View {

private final Drawable rotorDrawable;

public RotaryDialerView(Context context) {
  this(context, null);
}

public RotaryDialerView(Context context, AttributeSet attrs) {
  this(context, attrs, 0);
}

public RotaryDialerView(Context context, AttributeSet attrs, int defStyle) {
  super(context, attrs, defStyle);
  rotorDrawable = context.getResources().getDrawable(R.drawable.dialer);
}

@Override
protected void onDraw(Canvas canvas) {
  super.onDraw(canvas);
  canvas.save();

  rotorDrawable.setBounds(0, 0, rotorDrawable.getIntrinsicWidth(),
  rotorDrawable.getIntrinsicHeight());

  rotorDrawable.draw(canvas);

  canvas.restore();
 }
}
We load the dialer resource that is the only drawable with a dynamic behaviour. Here, we just display it.
The static images are displayed in the layout of the activity :
<?xml version="1.0" encoding="utf-8"?>
<LinearLayout xmlns:android="http://schemas.android.com/apk/res/android"
android:layout_width="fill_parent"
android:layout_height="fill_parent"
android:orientation="vertical" >

  <RelativeLayout
   android:layout_width="fill_parent"
   android:layout_height="fill_parent" >

    <View
     android:layout_width="320dip"
     android:layout_height="320dip"
     android:layout_centerInParent="true"
     android:background="@drawable/bg" />

    <com.ssaurel.rotarydialer.RotaryDialerView
     android:id="@+id/rotary_dialer"
     android:layout_width="320dip"
     android:layout_height="320dip"
     android:layout_centerInParent="true" />

    <View
     android:layout_width="320dip"
     android:layout_height="320dip"
     android:layout_centerInParent="true"
     android:background="@drawable/top" />
  </RelativeLayout>

</LinearLayout>
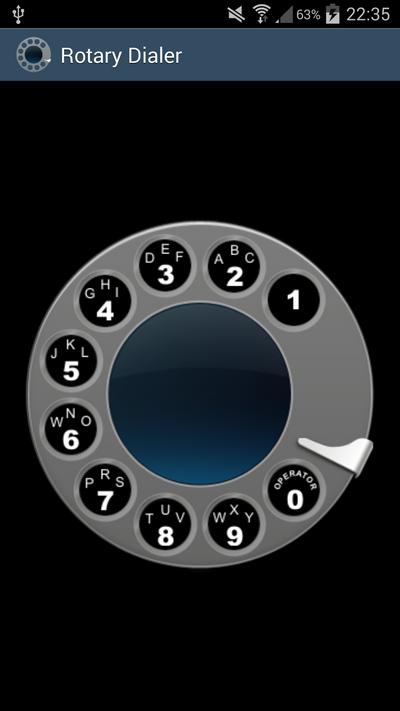
We can know test the display and see the result :
3. Animate the Rotary Dialer
With rotary dialer displayed, we have to animate the dialer when user makes a rotate touch on the screen. How to proceed ?
We’re going to listen touch events on RotaryDialerView. Then, we must make a litte bit of trigonometry to determinate the rotation angle. Goal is to use that angle to draw the dialer with a specific rotation of that angle.
During MotionEvent.ACTION_MOVE, we set the new angle of rotation and choose to redraw the view. Note that you must add a rotation of that angle when you draw the dialer. When MotionEvent.ACTION_UP is fired, we can get the actual position of the dialer compared to the tick and so get the number dialed. We fire that event with a specific method.
Code of RotaryDialerView is updated like this :
public class RotaryDialerView extends View {

  private float rotorAngle;
  private final Drawable rotorDrawable;
  private final int r1 = 50;
  private final int r2 = 160;
  private double lastFi;

  public RotaryDialerView(Context context) {
    this(context, null);
  }

  public RotaryDialerView(Context context, AttributeSet attrs) {
    this(context, attrs, 0);
  }

  public RotaryDialerView(Context context, AttributeSet attrs, int defStyle) {
    super(context, attrs, defStyle);
    rotorDrawable = context.getResources().getDrawable(R.drawable.dialer);
  }

  private void fireDialListenerEvent(int number) {
    // TODO fire dial event
  }

  @Override
  protected void onDraw(Canvas canvas) {
    super.onDraw(canvas);
    int availableWidth = getRight() - getLeft();
    int availableHeight = getBottom() - getTop();

    int x = availableWidth / 2;
    int y = availableHeight / 2;

    canvas.save();

    rotorDrawable.setBounds(0, 0, rotorDrawable.getIntrinsicWidth(),
    rotorDrawable.getIntrinsicHeight());

    if (rotorAngle != 0) {
      canvas.rotate(rotorAngle, x, y);
    }

    rotorDrawable.draw(canvas);

    canvas.restore();
  }

  @Override
  public boolean onTouchEvent(MotionEvent event) {
    final float x0 = getWidth() / 2;
    final float y0 = getHeight() / 2;
    float x1 = event.getX();
    float y1 = event.getY();
    float x = x0 - x1;
    float y = y0 - y1;
    double r = Math.sqrt(x * x + y * y);
    double sinfi = y / r;
    double fi = Math.toDegrees(Math.asin(sinfi));

    if (x1 > x0 && y0 > y1) {
      fi = 180 - fi;
    } else if (x1 > x0 && y1 > y0) {
      fi = 180 - fi;
    } else if (x0 > x1 && y1 > y0) {
      fi += 360;
    }

    switch (event.getAction()) {
    case MotionEvent.ACTION_MOVE:
      if (r > r1 && r < r2) {
        rotorAngle += Math.abs(fi - lastFi) + 0.25f;
        rotorAngle %= 360;
        lastFi = fi;
        invalidate();
        return true;
      }

    case MotionEvent.ACTION_DOWN:
      rotorAngle = 0;
      lastFi = fi;
      return true;

    case MotionEvent.ACTION_UP:
      final float angle = rotorAngle % 360;
      int number = Math.round(angle - 20) / 30;

      if (number > 0) {
        if (number == 10) {
          number = 0;
        }

        fireDialListenerEvent(number);
      }

      rotorAngle = 0;

      post(new Runnable() {
        public void run() {
          float fromDegrees = angle;
          Animation anim = new RotateAnimation(fromDegrees, 0, Animation.RELATIVE_TO_SELF, 0.5f, Animation.RELATIVE_TO_SELF, 0.5f);
          anim.setInterpolator(AnimationUtils.loadInterpolator(getContext(), android.R.anim.decelerate_interpolator));
          anim.setDuration((long) (angle * 5L));
          startAnimation(anim);
        }
      });

      return true;
    default:
      break;
  }

  return super.onTouchEvent(event);
 }
}
Here, you must note the animation launched when user ends his touch on the screen. Goal is to replace the dialer to its start position with a rotate animation. The animation is defined with the standard Android android.R.anim.decelerate_interpolator .
4. Add a number area
Last step is to add a number area to display digits dialed. We update the layout like this :
<?xml version="1.0" encoding="utf-8"?>
<LinearLayout xmlns:android="http://schemas.android.com/apk/res/android"
android:layout_width="fill_parent"
android:layout_height="fill_parent"
android:orientation="vertical" >

  <RelativeLayout
   android:layout_width="fill_parent"
   android:layout_height="wrap_content" >

     <LinearLayout
      android:layout_width="fill_parent"
      android:layout_height="66dp"
      android:layout_alignParentLeft="true"
      android:layout_alignParentTop="true"
      android:layout_marginBottom="10dp"
      android:layout_marginLeft="10dp"
      android:layout_marginRight="10dp"
      android:layout_marginTop="10dp"
      android:orientation="horizontal" >

     <EditText
      android:id="@+id/digits"
      android:layout_width="0dip"
      android:layout_height="66dp"
      android:layout_weight="1"
      android:background="@drawable/btn_dial_textfield"
      android:focusableInTouchMode="false"
      android:freezesText="true"
      android:inputType="phone"
      android:maxLines="1"
      android:paddingLeft="45dip"
      android:scrollHorizontally="true"
      android:textColor="@color/dialer_button_text"
      android:textSize="28sp" />

     <ImageButton
      android:id="@+id/backspace"
      style="@android:style/Widget.Button.Inset"
      android:layout_width="wrap_content"
      android:layout_height="66dp"
      android:background="@drawable/btn_dial_delete"
      android:gravity="center"
      android:src="@drawable/ic_delete_phone_number" />
    </LinearLayout>

    <ImageView
     android:layout_width="wrap_content"
     android:layout_height="wrap_content"
     android:layout_alignParentLeft="true"
     android:layout_alignParentTop="true"
     android:layout_marginLeft="18dp"
     android:layout_marginTop="25dp"
     android:src="@drawable/ic_dial_number" />
  </RelativeLayout>

  <RelativeLayout
   android:layout_width="fill_parent"
   android:layout_height="fill_parent" >

   <View
    android:layout_width="320dip"
    android:layout_height="320dip"
    android:layout_centerInParent="true"
    android:background="@drawable/bg" />

   <com.ssaurel.rotarydialer.RotaryDialerView
    android:id="@+id/rotary_dialer"
    android:layout_width="320dip"
    android:layout_height="320dip"
    android:layout_centerInParent="true" />

   <View
    android:layout_width="320dip"
    android:layout_height="320dip"
    android:layout_centerInParent="true"
    android:background="@drawable/top" />
  </RelativeLayout>

</LinearLayout>
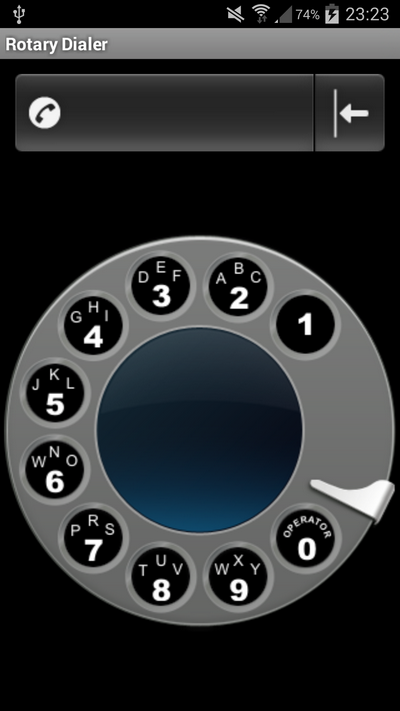
Our Rotary Dialer application now looks like this :
5. Fire dial event
We have a number are and so we must fill it with dialed number. To make that, we must implement the fireDialListenerEvent seen previously in the class RotaryDialerView.
We define a DialListener interface with onDial(int number) method. Class interested by digits dialed should implement that class and then register to the RotaryDialerView. We add the following code to RotaryDialerView :
public interface DialListener {
  void onDial(int number);
}

private final List<DialListener> dialListeners = new ArrayList<DialListener>();

// ...

public void addDialListener(DialListener listener) {
  dialListeners.add(listener);
}

public void removeDialListener(DialListener listener) {
  dialListeners.remove(listener);
}

private void fireDialListenerEvent(int number) {
  for (DialListener listener : dialListeners) {
    listener.onDial(number);
  }
}
6. Display number dialed
To display number dialed, we must register with our main activity as a DialListener to RotaryDialerView and display digit dialed :
public class RotaryDialer extends Activity {
  private EditText digits;

  @Override
  public void onCreate(Bundle savedInstanceState) {
    super.onCreate(savedInstanceState);
    setContentView(R.layout.main);
    RotaryDialerView rotaryDialerView = (RotaryDialerView) findViewById(R.id.rotary_dialer);
    digits = (EditText) findViewById(R.id.digits);
    rotaryDialerView.addDialListener(new RotaryDialerView.DialListener() {
      public void onDial(int number) {
        digits.append(String.valueOf(number));
      }
    });

    ImageButton backspace = (ImageButton) findViewById(R.id.backspace);
    backspace.setOnClickListener(new View.OnClickListener() {
      public void onClick(View v) {
        if (digits.getText().toString().length() > 0) {
          digits.getText().delete(digits.getText().length() - 1,
          digits.getText().length());
        }
      }
    });

    backspace.setOnLongClickListener(new View.OnLongClickListener() {
      public boolean onLongClick(View v) {
        if (digits.getText().toString().length() > 0) {
          digits.getText().clear();
          return true;
        }

        return false;
      }
    });

    digits.setOnClickListener(new View.OnClickListener() {
      public void onClick(View v) {
        makeCall();
      }
    });

}

  @Override
  public boolean onKeyDown(int keyCode, KeyEvent event) {
    if (keyCode == KeyEvent.KEYCODE_CALL) {
      makeCall();
      return true;
    }

    return super.onKeyDown(keyCode, event);
  }

  private void makeCall() {
    if (digits.getText().length() > 0) {
      String toDial = "tel:" + digits.getText().toString();
      startActivity(new Intent(Intent.ACTION_CALL, Uri.parse(toDial)));
    }
  }

}
Here, we have also added the possibility to send Intent.ACTION_CALL to launch a call with the dialed number.
7. Conclusion
To conclude, you can see our Rotary Dialer application in action in that demo video :
You have noticed that it’s an extended version of our Rotary Dialer application created during this tutorial. A lot of features have been added but the core feature is exactly the same. You can try the application here from Google Play Store : https://play.google.com/store/apps/details?id=com.ssaurel.oldrotarydialer
A Pro version with No Ads is also available here : https://play.google.com/store/apps/details?id=com.ssaurel.oldrotarydialer.pro
Now, it’s your turn to play. Don’t hesitate to create your own and add new exciting features :).
8. Extra
A live coding video to create Rotary Dialer application is also available here on Youtube :


8 Comments Already
Leave a Reply
You must be logged in to post a comment.
Nice post. I learn something new annd challenging on websites I stumbleupon everyday.
It’s always helpful to read articles from other writers and practice a little something from
other web sites.
Here is my blog – Online Wealth Academy Review (https://tackk.com/sppqvp)
Hello,
Yes, it’s a great way to learn new thing. I’m going to read your blog also.
Sylvain
Attractive section of content. I jusst stumbled upon your website and in accession capital to assert that I get actually enjoyed
account your blog posts. Any way I’ll be subscribing to your feeds and even I achievement you access
consistently quickly.
my site – Tsunami Sites Download
hi
who dwnload full source project Rotary Dialer
Pretty! This was an extremely wonderful article. Thanks forr supplying this
information.
My web-site :: Rapid Fire Product Creation Download (Lesli)
First of all thanks for this wonderful source code..
here everything works fine but the only issue is the when we select the number and rotate it to the finishing point it does not stop at there instead of it rotate after the end point how to solve this issue and stop the rotation when it reach its end..
Thanks in advice