Create a frame animation in XML on Android
Android offers to developers a great Animation API that lets them to create easily frame animation in XML or programmatically. In the following tutorial, you’re going to learn how to create a frame animation in XML. For this tutorial, we’re going to use a monster character that we want to animate.
- Get the frames of the monster’s animation
The following bitmaps represent frames to animate the monster :


- Create the animation in XML
When your Android application project is created, you need to put the bitmaps in a res/drawable directory. Then, you can create the Animation in XML like that :
<?xml version="1.0" encoding="utf-8"?>
<animation-list xmlns:android="http://schemas.android.com/apk/res/android"
android:oneshot="false" >

 <item
  android:drawable="@drawable/monster0"
  android:duration="250"/>
 <item
  android:drawable="@drawable/monster1"
  android:duration="250"/>
 <item
  android:drawable="@drawable/monster2"
  android:duration="250"/>
 <item
  android:drawable="@drawable/monster3"
  android:duration="250"/>
 <item
  android:drawable="@drawable/monster4"
  android:duration="250"/>
 <item
  android:drawable="@drawable/monster5"
  android:duration="250"/>
 <item
  android:drawable="@drawable/monster6"
  android:duration="250"/>
 <item
  android:drawable="@drawable/monster7"
  android:duration="250"/>
 <item
  android:drawable="@drawable/monster8"
  android:duration="250"/>
 <item
  android:drawable="@drawable/monster9"
  android:duration="250"/>

</animation-list>
Inside the animation-list tag, we define each frame thanks to item tag. Each item has a reference to a drawable that represents a frame, and also a duration in ms. Here, we choose to declare each frame for monster from 0 to 9 with a 250 ms as duration.
- Create the layout
Layout of the Android applications is very simple. A RelativeLayout with an ImageView inside. We must just define the animation as a background for the ImageView like that :
<RelativeLayout xmlns:android="http://schemas.android.com/apk/res/android"
 xmlns:tools="http://schemas.android.com/tools"
 android:layout_width="match_parent"
 android:layout_height="match_parent"
 android:paddingBottom="@dimen/activity_vertical_margin"
 android:paddingLeft="@dimen/activity_horizontal_margin"
 android:paddingRight="@dimen/activity_horizontal_margin"
 android:paddingTop="@dimen/activity_vertical_margin"
 android:background="#FFFFFF"
 tools:context="com.ssaurel.animationsprite.MainActivity" >

 <ImageView
  android:id="@+id/img"
  android:layout_width="wrap_content"
  android:layout_height="wrap_content"
  android:layout_centerInParent="true"
  android:background="@drawable/run_monster" />

</RelativeLayout>
- Run the animation
In the activity where you decide to use the animation, you need to set the layout and to get an instance to the ImageView. Then, we post a Runnable on the instance in which we get the background of the image and call the start method of the AnimationDrawable associated :
public class MainActivity extends Activity {

 private ImageView img;

 @SuppressLint("NewApi") @Override
 protected void onCreate(Bundle savedInstanceState) {
  super.onCreate(savedInstanceState);
  setContentView(R.layout.activity_main);
  img = (ImageView) findViewById(R.id.img);

  img.post(new Runnable() {

    @Override
    public void run() {
      ((AnimationDrawable) img.getBackground()).start();
    }

  });
 }
}
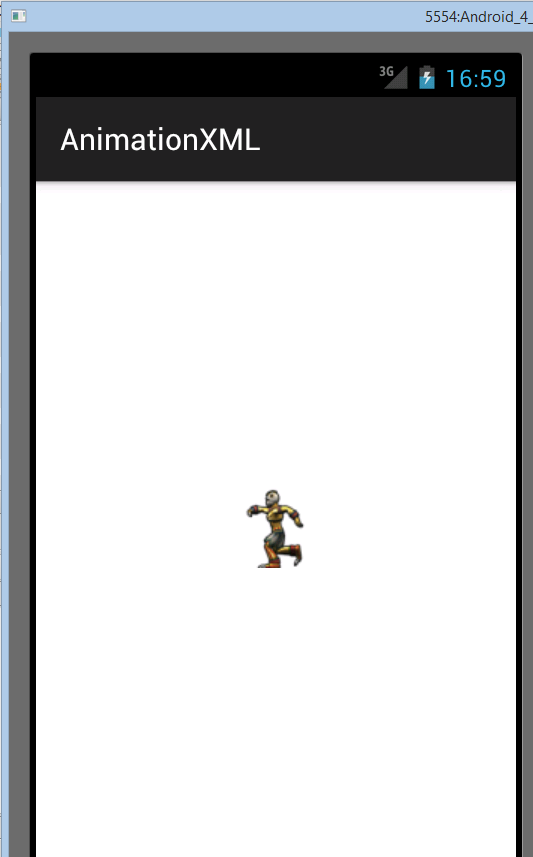
- Demo
You can now enjoy the final result of the frame animation :
- Extra – Live coding in video on Youtube
As an extra to this tutorial, you can find the live coding in video on Youtube :


Leave a Reply
You must be logged in to post a comment.